Sunday, October 17, 2010

Chilli Jam - Make This Please


This is not the first time I've talked about Chilli Jam here. But you see it is the stuff of magic making in your mouth. So good that I have contemplated eating it from the jar the way some of you eat nutella. This chilli jam is what started the friendship I talked about in my post on Whip Up.

After a discussion about 20kgs of tomatoes and a school fete on twitter I'm offering the recipe up for one and all. This is the chilli jam my Dad makes (always with an assortment of homegrown chillis). He has many bastardised versions he makes, but this is the recipe that started it all.


Chilli Jam
- 2 kg ripe tomatoes
- 150ml olive oil
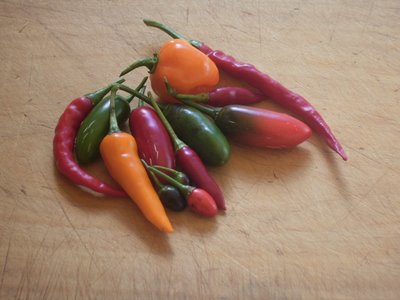
- chillis - depends on how hot you like it really. I use 4-5 habenero or 10 medium - long red chillis. You can also deseed some of the chillis if you want. It's really up to you
- 20 garlic cloves, peeled and chopped
- 50g piece of fressh ginger peeled and chopped
- 2 tbsp cummin
- 2 tbsp brown mustard seeds (I often leave these out if they're not in the pantry)
- 1 tbsp tumeric
- 50ml fish sauce
- 200 ml red wine vinnegar
- 200g brown sugar
Optional: 2 red capsicums )or more if you want)


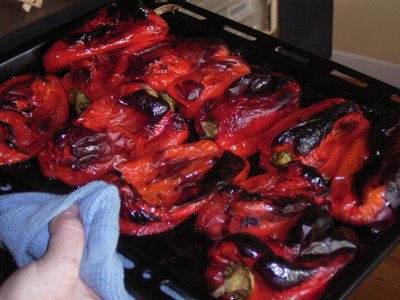
- Put the tomaotes (and capsicums if you're using them) on a baking tray and drizzle with some extra olive oil. Roast in a moderate to hot oven for 20 minutes until the skins start to blister and split.

- While the tomatoes are in the oven, in a food processor combine the chilli, garlic, ginger, cumin, mustard seeds, tumeric, fish sauce, red wine vinegar, brown sugar and olive oil.

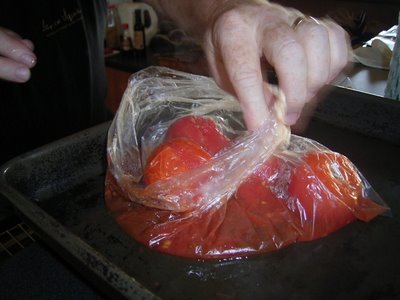
- When the tomatoes are ready use tongs to peel the skins off (you should be able to grab the skin and most of it will come away). Or put in a plastic bag and the tomatoes will sweat a little making it easier to remove the skins. Same with the capsicum. Watch out for your fingers in this step the tomatoes are hot.


- Put the tomatoes (and capsicums) and combined chilli mix into a heavy based saucepan. Add salt and pepper to taste.

- Bring to the boil then reduce to a very low simmer and cook for 1 1/2 - 2 hours, stirring frequently to make sure the jam doesn't catch.

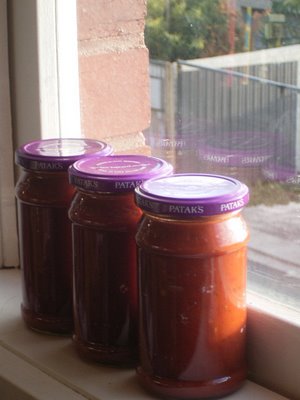
- While the jam is boiling sterlise your jars.

-When the chilli jam is ready, ladle the hot jam into a pouring jug and use this to pour the jam into hot sterlised jars (always hot jam into hot jars). Put the lids on.

- Allow to cool.

This jam is great on sandwhiches, seriously good under melted cheese on toast and amazing with corn fritters. Also try it with really nice fresh bread and cream cheese. A jar doesn't last long in our house.

Wednesday, October 13, 2010

The Little Picnic Blanket That Could


This is the story of the little picnic blanket that could. It was started more than a year ago. Well and truly more than a year ago. The fabric selection was quick and completely from the stash. The piecing was random and happened quickly.

When I started machine quilting the back and front together - didn't bother with a batting layer as I didn't want any bulk - I realised I had a wonky piece of fabric for the back. Oh well. I just added some "feature" pieces to the edges using the same fabric and you know I'm a little bit in love with the mistake made good.


Then came time to do the binding. I decided I would not cut corners - as I usually do with such things - and so a proper approach was decided upon. You know, sew on one side of the binding then handsew the other side on.

I should have known better. Took me no time to machine sew the first side on. You know where this is going right. But it didn't matter that it took me over a year to finish hand sewing the binding on. We used the blanket anyway. People didn't seem to notice the binding flapping in the breeze.

And finally a couple of weeks ago I finished sewing the binding on. And now spring has sprung the blanket is getting a real work out.

Just so you know I have no issues with shortcutting on binding now.

Saturday, October 09, 2010

Meringues, but not as you know it


Thanks for all the birthday wishes for the resident three year old Smurf. He has already requested another birthday. I told him he could have one next year.

One of the hits of the make your own lolly bags was the meringue rings. Inspired by what I now know to be a piece of jewellery (I have no idea where I originally saw it, but I bookmarked the photo and now I've googled the image and realised it was jewellery!)


So, armed with the piping bag I piped out a bunch. It's quite simple really. Pipe the circle for the ring - thinking about the size of the intended finger - and then pipe a star on the edge of the circle. Gently sprinkle sprinkles on the star. Bake as per normal meringues.

The kids went straight for them after the pink cake candles were blown out. They fit perfectly on little fingers and were nibbled straight off.


I had loads of meringue - even after a batch of actual meringues and meringue rings so I started to have a play around. I switched to my thinnest piping nozzle and started to pipe the kids names. I got happy with the sprinkles and baked them alongside the rest of the sugary eggwhite.


They turned out fab. But in my haste to admire them I cracked each and every one of them as I lifted them off the tray. So, if you try these, here are some tips:

- Err on the side of thicker when piping
- Look out for skinny parts of letters (see beginning of the 'm' in Sam below)
- Make sure you leave them to completely cool on the tray
- Use a flat spatula to very carefully slide them off the tray.


Also, only invite kids with short names to your party - less risk of breakage with less letters.