Showing posts with label make it. Show all posts

Sunday, April 07, 2013

Super Stuff - a how to of sorts


A few weeks ago we had an invite to a 5th birthday party. We spend a bit of time with this 5 year old. Her brief was "something in pink or purple and not something for boys". I can do that, I thought. As time drew closer, I felt little inspiration in the way of something to purchase.

Whenever Miss L visits our house, all the dress ups are pulled out and everyone strips down and dresses up. So I hit my pinterest boards looking for some homemade dress up inspiration.


And so, Super L was created. A personalised cape, super powered cuffs, mask for identity protection, shoe wings for flying (inspired by this pin). All reversible.

I do have some issues with Super Heroes; we spend a lot of time talking about how Emergency Services people are the real super heroes. However, we couldn't hold the flood gates closed on the superhero barrage, so The Smurf has lots of generic, homemade dress ups as well as the trademarked super people. And he loves them. So, I was hopeful Super L would feel the same.


I started out writing instructions for each piece, but really it is as simple as drawing the shapes and going from there. It's pretty simple to work things out from the pictures.

A How To of sorts... 

  • The wrist cuffs are rectangles of felt and joined on the short ends with two pieces of elastic attached at each end of the cuff. The cuff becomes a tube that is easily slipped on and off. I based the size on a toilet paper roll - The Smurf has quite a collection of super hero cuffs made from toilet paper rolls.


  • The mask is two pieces of felt sewn together with elastic sandwiched at the outer edges. No fussy turning out and clipping seams, just draw a template, place it on top of two pieces of felt, trace (with a seam allowance), sew and cut out - be careful not to cut the elastic while you're at it.


  • The shoe wings are again two layers of felt. Draw the shape on paper first so you can tweak it until you're happy. Trace, sew, cut. Then punch some shoelace holes for threading onto shoes. 


  • There are endless free cape tutorials on the web. My favourite is this one by Suzy at Floating World. However, the last few times I've made capes, I've used just one piece of fabric, rather than having a separate piece for the neckline. 
  • To make a reversible one-piece cape, I fold a piece of fabric in half length ways and use a kids singlet to get a rough guide on the depth of the neckline and tweak a bit deeper from that. Then simply draw the rest of the shape as you choose. Place the cut out piece face down on your second piece of fabric. Pin and sew around your shape, leaving a gap for turning in the right way. Clip your curves, turn in the right way and top stitch. Sew small pieces of velcro at the neck joins (remember Edna in The Incredibles says "No Capes!" so it needs to easily rip apart if it gets caught). 

How do you feel about Super Heroes? Have you kept them at bay at your place or is it all Pow! Bang! Biff! Boom!

Sunday, October 17, 2010

Chilli Jam - Make This Please


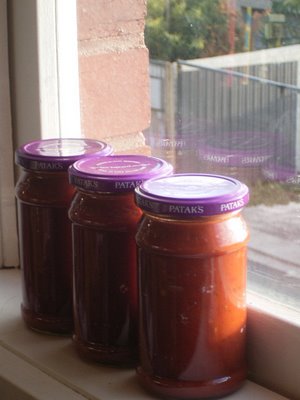
This is not the first time I've talked about Chilli Jam here. But you see it is the stuff of magic making in your mouth. So good that I have contemplated eating it from the jar the way some of you eat nutella. This chilli jam is what started the friendship I talked about in my post on Whip Up.

After a discussion about 20kgs of tomatoes and a school fete on twitter I'm offering the recipe up for one and all. This is the chilli jam my Dad makes (always with an assortment of homegrown chillis). He has many bastardised versions he makes, but this is the recipe that started it all.


Chilli Jam
- 2 kg ripe tomatoes
- 150ml olive oil
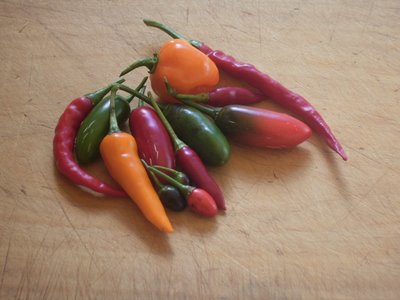
- chillis - depends on how hot you like it really. I use 4-5 habenero or 10 medium - long red chillis. You can also deseed some of the chillis if you want. It's really up to you
- 20 garlic cloves, peeled and chopped
- 50g piece of fressh ginger peeled and chopped
- 2 tbsp cummin
- 2 tbsp brown mustard seeds (I often leave these out if they're not in the pantry)
- 1 tbsp tumeric
- 50ml fish sauce
- 200 ml red wine vinnegar
- 200g brown sugar
Optional: 2 red capsicums )or more if you want)


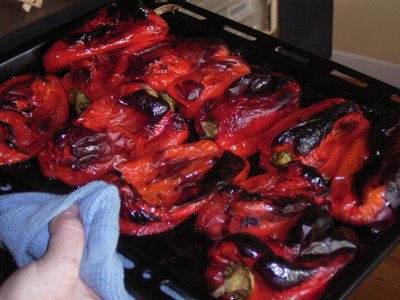
- Put the tomaotes (and capsicums if you're using them) on a baking tray and drizzle with some extra olive oil. Roast in a moderate to hot oven for 20 minutes until the skins start to blister and split.

- While the tomatoes are in the oven, in a food processor combine the chilli, garlic, ginger, cumin, mustard seeds, tumeric, fish sauce, red wine vinegar, brown sugar and olive oil.

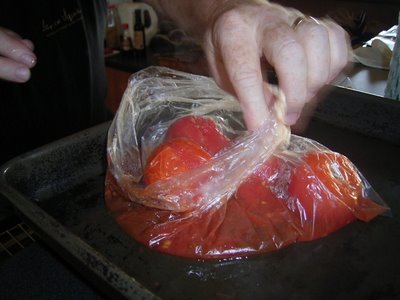
- When the tomatoes are ready use tongs to peel the skins off (you should be able to grab the skin and most of it will come away). Or put in a plastic bag and the tomatoes will sweat a little making it easier to remove the skins. Same with the capsicum. Watch out for your fingers in this step the tomatoes are hot.


- Put the tomatoes (and capsicums) and combined chilli mix into a heavy based saucepan. Add salt and pepper to taste.

- Bring to the boil then reduce to a very low simmer and cook for 1 1/2 - 2 hours, stirring frequently to make sure the jam doesn't catch.

- While the jam is boiling sterlise your jars.

-When the chilli jam is ready, ladle the hot jam into a pouring jug and use this to pour the jam into hot sterlised jars (always hot jam into hot jars). Put the lids on.

- Allow to cool.

This jam is great on sandwhiches, seriously good under melted cheese on toast and amazing with corn fritters. Also try it with really nice fresh bread and cream cheese. A jar doesn't last long in our house.

Saturday, October 09, 2010

Meringues, but not as you know it


Thanks for all the birthday wishes for the resident three year old Smurf. He has already requested another birthday. I told him he could have one next year.

One of the hits of the make your own lolly bags was the meringue rings. Inspired by what I now know to be a piece of jewellery (I have no idea where I originally saw it, but I bookmarked the photo and now I've googled the image and realised it was jewellery!)


So, armed with the piping bag I piped out a bunch. It's quite simple really. Pipe the circle for the ring - thinking about the size of the intended finger - and then pipe a star on the edge of the circle. Gently sprinkle sprinkles on the star. Bake as per normal meringues.

The kids went straight for them after the pink cake candles were blown out. They fit perfectly on little fingers and were nibbled straight off.


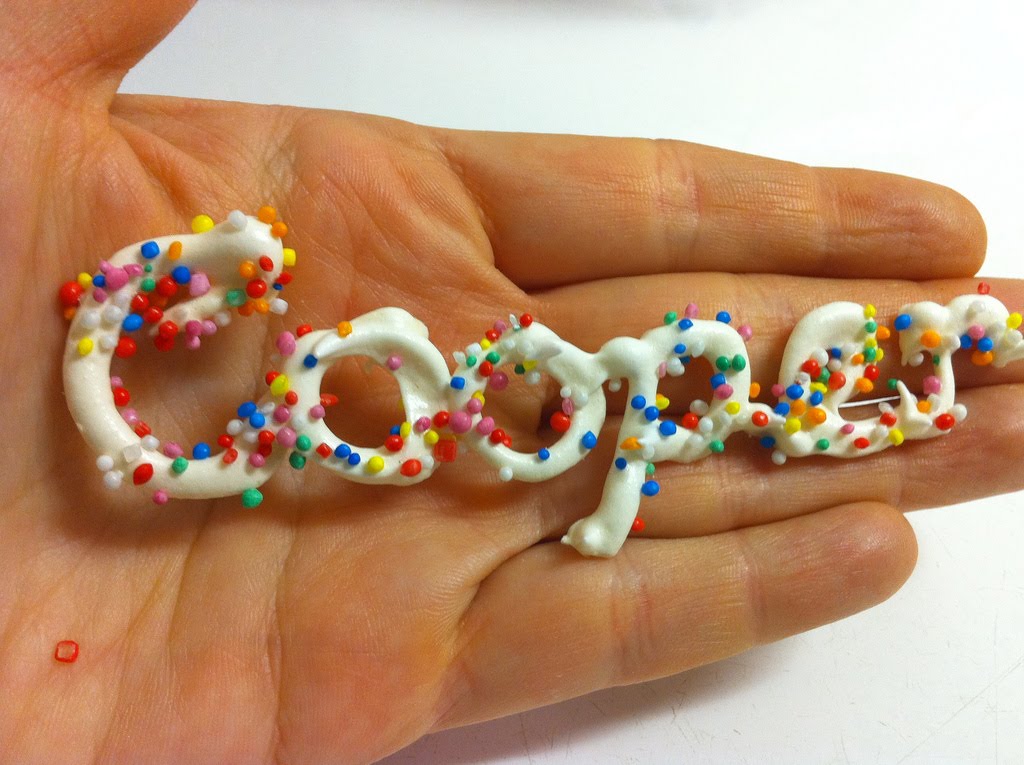
I had loads of meringue - even after a batch of actual meringues and meringue rings so I started to have a play around. I switched to my thinnest piping nozzle and started to pipe the kids names. I got happy with the sprinkles and baked them alongside the rest of the sugary eggwhite.


They turned out fab. But in my haste to admire them I cracked each and every one of them as I lifted them off the tray. So, if you try these, here are some tips:

- Err on the side of thicker when piping
- Look out for skinny parts of letters (see beginning of the 'm' in Sam below)
- Make sure you leave them to completely cool on the tray
- Use a flat spatula to very carefully slide them off the tray.


Also, only invite kids with short names to your party - less risk of breakage with less letters.

Thursday, March 18, 2010

Toddler Distracting 101 - Freckles


Here, my friends, lies the secret to distracting a toddler - homemade Freckles. It's a winner two times over - the making and the eating. But you've all done this one before, haven't you.

Step 1:


Melt some chocolate. There's no science to this, if you melt more chocolate you get more freckles. Feel free to use some expensive couverture chocolate if your toddler appreciates the finer things in life.

Step 2:


Spoon the melted chocolate on a tray lined with baking paper. If you're brave, let the toddler do it. If you're a little more on the anal side, let the toddler watch and then start on the next step while you keep dolloping chocolate on the tray.

Step 3:


Toddler's turn. Let them loose with a spoon and a little bowl of sprinkles. They can sprinkle until their heart's content.

Leave them on the tray to set - or put them in the fridge if the toddler you're impatient.

Step 4:


Eat and enjoy the peace, or use for bribes as required, whatever you need to get you through the day.

Tuesday, February 02, 2010

Playing with Vinyl a tutorial.


New school adventures - for the nephew, not the Smurf and excitement levels are, apparently, at absolute fever pitch. It was certainly time for him to venture a little further from the nest and embark on the school adventure. I thought I'd aid him in his adventure with a pencil case with his name on it.

It went down a treat. I felt like a bit of a fraud; the whole thing was deceptively easy. That fear I'd been holding on to of sewing with vinyl - needles snapping, machine munching vinyl, stitches slipping - was completely unfounded. The project took 30 minutes from go to woe.

So, go try it yourself:

You need vinyl, a zip, scissors, sewing machine

1. Cut out 2 matching rectangles of vinyl for the outside of your pencil case. Make the longest edge slightly longer than your zip. These will be the sides of the pencil case.

2. Trace your letters onto the back of vinyl scraps or small pieces, I just used a felt tip pen. Remember to reverse the letters. I used the letter templates in this Beeper Bebe project by the very talented Holly.

3. Cut the letters out and arrange them on one of the large rectangles. Play around with the placement until you are happy. Starting with the first letter, carefully hold it in place (don't pin) and using a zigzag stitch sew to the rectangle. Repeat with each letter.


4. Using a zipper foot and with right sides facing sew one side of your zip to the top edge of your rectangle. Repeat with the other side of your zip and other rectangle. Here's a good zipper tutorial if you're scared of zippers, it's OK I once was too!

5. On the right side, of each rectangle top stitch your zipper seam.

5. With rights sides of your rectangles facing, sew the remaining three sides together (see that tutorial up there in point 4 if your not sure how to do this).

6. Using pinking shears, trim the excess. Trim diagonally across each corner, being careful not to snip the seams. If you don't have pinking shears, use an edging stitch to sew around the edge of the three sides you just sewed.

7. Turn your pencil case right side out, poke the corners out well. And you're ready for some fancy pants new pencils to put in that case.

Sunday, November 08, 2009

Tutorial: Christmas Tree Bunting


As promised yesterday, here's how I made my christmas tree bunting.

Materials:
Fabric scraps the type of fabric doesn't matter.
Backing fabric, I used green flannelette, but you could use anything you like.
Bias binding approximately 2 metres will accommodate 10 trees.
Pinking shears, scissors, tailors chalk, sewing machine, thread etc


Step 1: Choose your shape, I've used the one on the right.

Draw your tree shape on card and cut out. Or download the simple template (tree on left) here or the template for the tree on the right here. Print on card (although normal paper would be fine if you don't have card) and cut out.

You can re-size the template to make smaller or larger trees.


Step 2: Collect your fabrics


I used mostly scraps and a little bit from the stash, loosely following a green theme.


Step 3: Start making your trees. With wrong sides facing, lay the fabric for your first tree on top of the backing fabric.


Pin in the template in place on top of your fabric. Starting at the base of the "trunk", sew around the edge following the template. Don't forget to secure your sewing with a couple of back stitches at the beginning and end, this will ensure your tree stays together.

Instead of pinning you could trace around the template with a disappearing marker and then pin the layers together and sew.


Using pinking shears - or, if you don't have them, normal scissors - trim around your tree. Be careful not to cut into the stitches.

The front looks like this:


The back looks like this:


Continue making trees until you have enough to fill your length of bias binding. I made 10.


Step 4: Assemble your trees on the binding.

Start by laying your binding out to it's full length ( like on your bed or on the floor). Arrange your trees along the binding to ensure you get the right spacings. Rearrange as needed to make the colours work for you. Make sure there is enough length at either end to hang the bunting.

When you're happy with the order and space, use tailors chalk or a disappearing marker, to mark a little cross on the binding to show where each tree will hang from.

Pile your trees up in order and take your binding and trees to the sewing machine.

Use thread matching your binding and a large, wide zig-zag stitch start at one end and stitch the binding together. Pause just before the first chalk marking and tuck the top of the first tree inside the binding. Make sure the tree is flat and sitting straight so that it will hang properly when you're finished. Shorten the stitch length on your machine. Continue sewing along the binding making sure you catch the top of the tree. Once the tree is attached, lengthen the stitch length again.

Shortening the stitches where the tree attaches to the binding ensures there are enough stitches to hold onto the tree. You don't have to do this, you can use a shorter stitch length the whole way, I just like the way the big zig-zag stitches look across the bunting.


Continue in this way until all trees are attached to the binding.

Tie a knot in the binding at each end of the bunting.


Hang on the wall.


Although you might want to wait until a little closer to Christmas before hanging.

If you make these, please post a comment or email me to let me know, I'd love to see them!

Monday, October 19, 2009

More Hats - and a better way to finish


Yes, yet another hat. Perfect for sipping (baby) cino in the window of your favourite local cafe.

As promised, an explanation of the very simple work around on the "Lazy Day Hat" pattern. The final part of the pattern asks you to unpick the seam in the band to turn the hat right way out. You then hand sew that seam back together. Of course this is perfectly fine, but personally I find the finished seam a bit messy this way - but maybe that's more to do with my hand sewing than the pattern?

Anyway, instead of unpicking the seam, just leave a gap when you attach the brim to the band and turn the hat through the gap. (look Ms Fruiti - pins!)


Then just carefully tuck the raw edges under and top stitch all the way around the seam joining the brim and band, making sure you close the gap.


Are you making hats?

Saturday, October 17, 2009

Personalised Kids Bday Party - Lolly bags


A little bit more to share from the party. This time the consumables in the lolly bag, Biccie Boys and the actual lollies.

I didn't want to fill the lolly bag with rubbish, but at the same time I didn't want to deprive the kids (um parents?) of their fill of yum. So, I figured the Smurf's favs would be easy and a few lollies for the kids old enough to eat them.


I thought that having the consumables in little bags would help the kids feel like there was more to the lolly bag experience.


The bags were bought many moons ago probably from Spotlight or Lincraft. The stickers were a cinch. Just print your sticker onto label paper, cut, peel and stick. Download my templates here or use your software program of choice to lay your stickers out.


Next up, homemade colouring books.

Thursday, October 15, 2009

Personalised Kids Bday Party - Homemade Stickers!


Thanks for all the party love on the Happy Smurfday post. As promised I wanted to share some of the easy ways I personalised the party. Don't freak out, I'm by no means recommending some crazy arse approach to hosting your next kiddie bday bash, oh no. I'm more of a half-arse approach lady so never fear this will be easy peasy.

So, the stickers. These went into the "lolly" bags and as labels on the pencil packs.

There are two ways you can do these at home, with a Xyron Sticker Machine or label paper. I used my handy dandy little Xyron machine, which I bought years ago and have never really used for anything other than playing around. You can pick them up at Lincraft for $12.99 (complete with sticker paper cartridge).

You also need:


- Images for your stickers. You can download my sticker templates here.
- paper to print your stickers on, high gloss photo paper if using the sticker machine, or label paper.
- scissors - or a circle cutter - to cut your stickers out
- baking paper if you're not using a sticker machine

1. Layout and print your Stickers
Use whichever software you are comfortable with to layout the graphics you want to make into stickers. I'm a simpleton and use word. Gasp!

I used the same vintage embroidery pattern I used for the invites and coloured the image in using the "paint" program on my laptop. I then resized the image and imported it into word along with some free icons. I also added a sticker with the name of each kid.

Or, to save time, just download my template here.

If you're using the sticker machine, print onto the high gloss photo paper - I find this gives a more durable and shiney finished sticker that looks "more like a sticker", but feel free to use paper of your choice.

If you're going with the label paper, print your stickers on there.

2. Cutting
Cut the stickers out taking care to be neat. Check the width of your sticker to make sure it will feed through the machine without touching the edges of the channel you feed the stickers through.


3. Get some sticky on your sticker.
For the sticker machine, feed your sticker in the gap on the top of the machine. This puts the sticker between the backing paper and the sticky layer.


At this point you don't need to be too careful about lining things up as you can peel the stickers and reapply them evenly along the backing paper once you've finished each batch.

Gently pull the sticker through the bottom end while you continue to carefully push the sticker through the top.


Tear off your sticker and rub, rub, rub.


This makes sure the sticky sticks to the back of the sticker.

For label paper, carefully peel the backing paper off your sticker and arrange on a strip of baking paper.

Da dah, homemade stickers!


Now, don't wait for the next birthday party, go make stickers! (Look out for the Lolly bag and Biccie Boy stickers next post)