Showing posts with label sewing. Show all posts

Monday, June 10, 2013

Sewing Smurf


My Smurf never ceases to amaze me. This weekend we collaborated on a craft project I have been thinking about doing together for the longest time.

He drew his own images on fabric and I sewed them into something 3 dimensional and filled with stuffing. Only, my vision was slightly wrong. I didn't do the sewing, the Smurf did.


After learning how to lift the presser foot, manually move the needle, place the fabric and cut the thread he was ready to sew some lines. And then turn corners.


He was busting to bring his fabric drawings to three dimensional life. A tree with bark, leaves and birds to become a soft toy and a tree with an owl surrounded by the Teenage Mutant Ninja Turtles for a cushion.

And so off he went, after carefully choosing his backing fabrics (flannelette for the back of the soft toy as it will be cuddled and the flannelette is soft!). He sewed some parts completely by himself (foot on peddle and guiding the stitching) with verbal guidance from me and some parts with me physically helping to guide the fabric or sewing a line first for him to then follow on his own.


He could not be more proud of the outcome. Nor can I.


He is busy planning his next few creations. Every time I look at these photos my heart feels like it might literally burst with pride.


Sunday, April 07, 2013

Super Stuff - a how to of sorts


A few weeks ago we had an invite to a 5th birthday party. We spend a bit of time with this 5 year old. Her brief was "something in pink or purple and not something for boys". I can do that, I thought. As time drew closer, I felt little inspiration in the way of something to purchase.

Whenever Miss L visits our house, all the dress ups are pulled out and everyone strips down and dresses up. So I hit my pinterest boards looking for some homemade dress up inspiration.


And so, Super L was created. A personalised cape, super powered cuffs, mask for identity protection, shoe wings for flying (inspired by this pin). All reversible.

I do have some issues with Super Heroes; we spend a lot of time talking about how Emergency Services people are the real super heroes. However, we couldn't hold the flood gates closed on the superhero barrage, so The Smurf has lots of generic, homemade dress ups as well as the trademarked super people. And he loves them. So, I was hopeful Super L would feel the same.


I started out writing instructions for each piece, but really it is as simple as drawing the shapes and going from there. It's pretty simple to work things out from the pictures.

A How To of sorts... 

  • The wrist cuffs are rectangles of felt and joined on the short ends with two pieces of elastic attached at each end of the cuff. The cuff becomes a tube that is easily slipped on and off. I based the size on a toilet paper roll - The Smurf has quite a collection of super hero cuffs made from toilet paper rolls.


  • The mask is two pieces of felt sewn together with elastic sandwiched at the outer edges. No fussy turning out and clipping seams, just draw a template, place it on top of two pieces of felt, trace (with a seam allowance), sew and cut out - be careful not to cut the elastic while you're at it.


  • The shoe wings are again two layers of felt. Draw the shape on paper first so you can tweak it until you're happy. Trace, sew, cut. Then punch some shoelace holes for threading onto shoes. 


  • There are endless free cape tutorials on the web. My favourite is this one by Suzy at Floating World. However, the last few times I've made capes, I've used just one piece of fabric, rather than having a separate piece for the neckline. 
  • To make a reversible one-piece cape, I fold a piece of fabric in half length ways and use a kids singlet to get a rough guide on the depth of the neckline and tweak a bit deeper from that. Then simply draw the rest of the shape as you choose. Place the cut out piece face down on your second piece of fabric. Pin and sew around your shape, leaving a gap for turning in the right way. Clip your curves, turn in the right way and top stitch. Sew small pieces of velcro at the neck joins (remember Edna in The Incredibles says "No Capes!" so it needs to easily rip apart if it gets caught). 

How do you feel about Super Heroes? Have you kept them at bay at your place or is it all Pow! Bang! Biff! Boom!

Wednesday, October 31, 2012

Little Red Dress


I don't get much sewing time at the moment, mere snippets here and there. I'm combating that by tracing and cutting heaps of patterns in advance, pairing them up with fabric and loading up a basket with it all. That way when I have a rare snippet of time to sew I am ready to go. I figure it's more satisfying that way.


Of course I got a bit over excited with my tracing and cutting plans and it has taken forever to trace and cut everything and get it to the basket. It took all my self control not to just start sewing. In the end I cut my tracing list short and just got cracking.


Starting with this sweet little red dress. Not sure who it will be for yet, but there is a new list of little girls needing christmas presents and this will fit the bill for one of them.


The pattern is the Little Deer Pinafore from Ottobre 2008/1. I was intending to just test the pattern with this red spot before using the "nice" fabric but I really like it. And look! It has piping. And perfect buttons; thank you enormous button stash.

Oh and here's one of my photography assistants/trip hazards: 


Thursday, August 18, 2011

Homesewn


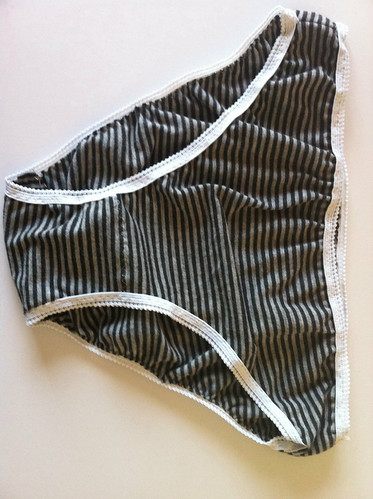
I made some undies! Yep, made my own undies.

Whenever I tell people they seem to think it's hugely amusing or gross. Whatever, I'm not the first to make my own. It was ridiculously easy too, instead of a pattern you cut up an old pair and trace a pattern from them. Easy! You can even use a (washed) old tshirt.

Next time I will sew the elastic on the inside, I think. I used a slightly heavy jersey, which makes for a nice comfy fit.

I followed the details here.

What do you think about sewing your own undies? Hugely amusing? Gawd you're disgusting? Or I'm clicking on that link right now!

Sunday, May 08, 2011

On saddles and getting back in them

It's not like I don't think about coming back to this space. And it's not like I'm not doing any crafty stuff. It's just that I've been away from this space for so long that I get intimidated by getting started back on posting. 

So I'll keep it simple while I'm climbing back into the saddle. Simple, like this Asymmetrical Wrap top I made a few weeks ago. Genius pattern. Cut in 1 piece in 5 mins. Another 5 for adjusting and a maximum of 10 minutes zig-zag stitching around the edges  because I couldn't be arsed to change the thread on the overlocker. 

Made in a cheap wool acrylic blend to test the pattern. So good that I'm now busy assessing the nice stuff to make some more of these.

Fix it closed with a brooch and it's my new fav top for wearing in autumn. 

Nice to see you again! I think I'll come back soon to tell you about How to Love Canberra and my beautiful "vintage" house.

Saturday, February 12, 2011

For Me


I was inspired to think about blogging again last night, by a meeting of like-minded local ladies of the Information Super Highway. It reminded me (not the ladies, but the desire to blog) that I had a little blouse fest recently - well if you can call sewing two blouses a fest.

I knew I would need some light cotton tops for the hot Canberra summer, so I raided the stash for the cheapie cotton (to test some patterns) and set out. The first was the very easy Made By Rae Spring Ruffle Top - minus the ruffles for me thanks.


Super easy, minimal pieces to cut and a cinch to put together. I didn't quite have the width in my cheap IKEA fabric to allow for much gathering, but I think I prefer it this way. I have some voile cut and ready to make another one.

If you're thinking about starting out sewing your own clothes, try the Made by Rae top.


Then I went on a wild, magical, mystery sewing adventure where I used three tops from my wardrobe to scramble a pattern together. It's not perfect, but I really like it - especially the pin tucks on the bust.


The sleeve lines need adjusting and the neckline needs fixing and the addition of some facing (or the neck binding to be cut on the true bias) to stop the gapping, but for a wearable muslin I'm pretty happy and will be doing this one again.

Sunday, November 07, 2010

New Dress


On the craft weekend I made three dresses. Two little baby ones for presents and one-for-me. Yep, a dress for me. It has lining and it's fitted and a little bit of trickiness and I made it and I couldn't be happier.

I think it's a great example of how my sewing skills have come along. Don't get me wrong, I have a long way to go. But I look back on my sewing and there was a time I would have been afraid to attack even a simple dress like this, especially with lining.


Simplicity pattern 3803. The fabric is a cheap cotton I bought on sale at scragfight thinking that it wouldn't matter if the dress didn't work because the fabric was cheap. Only problem is, I really like this fabric now and wish I had more.

I will definitely make this again and next time I'll cut one size bigger in the bust and also cut the arm holes a little higher.

Wednesday, October 13, 2010

The Little Picnic Blanket That Could


This is the story of the little picnic blanket that could. It was started more than a year ago. Well and truly more than a year ago. The fabric selection was quick and completely from the stash. The piecing was random and happened quickly.

When I started machine quilting the back and front together - didn't bother with a batting layer as I didn't want any bulk - I realised I had a wonky piece of fabric for the back. Oh well. I just added some "feature" pieces to the edges using the same fabric and you know I'm a little bit in love with the mistake made good.


Then came time to do the binding. I decided I would not cut corners - as I usually do with such things - and so a proper approach was decided upon. You know, sew on one side of the binding then handsew the other side on.

I should have known better. Took me no time to machine sew the first side on. You know where this is going right. But it didn't matter that it took me over a year to finish hand sewing the binding on. We used the blanket anyway. People didn't seem to notice the binding flapping in the breeze.

And finally a couple of weeks ago I finished sewing the binding on. And now spring has sprung the blanket is getting a real work out.

Just so you know I have no issues with shortcutting on binding now.

Tuesday, August 17, 2010

The Art of Choosing Your Audience


Recently I posted about my uncertainty about giving handmade gifts and the reception they might attract. I received some fabulous feedback, insightful commentry and lots of cyber hugs. It was swell.

But I've moved on. My best audience is right in front of me and there is no better recipient of a handmade gift than a nearly 3 year old Smurf.

He pestered these mittens right off the needles.


Then wore his new hat around all afternoon despite being inside on a rainy day and then insisted it replace his much cherished pink beanie (also a well received knit) on daily outings.


Stats:
Hat - like these
Mittens - fudged by me and based on 'Later Gator Mitten' measurements in Stitch n Bitch Nation

Monday, June 14, 2010

A weekend of craft indulgence


Photos courtesy of our resident photographer, Tutti Fruiti

Just a sample...1. hub of activity, 2. B + C, 3. J working on her liberty blouse, 4. F cutting out her bag pieces, 5. J + B, 6. Time to leave, 7. New hood, 8. bubbles, 9. happy hour

A whole weekend
For pure crafting pleasure
Great friends
Fantastic food
The best styled cheese platters ever seen by anyone
Personal sewing instructors - there were two of them!
Lots of laughing
Great company

I managed (with the aid of my personal instructors) a fully lined, hooded jacket (pattern: Ottobre 2007/3 Summer Hooded Jacket - sewn in mid weight cotton, lined with flanelette)


complete with pink sleeve lining (a special secret surprise for my little pink loving Smurf)


Some PJ pants using Curly Pops ace 70's pants pattern


As well as some knitting, crochet, a softie and a still to be tinkered with top for me - oh and a delicious dinner (if I do say so myself).

Can't wait for the next one.

Thursday, May 20, 2010

You're Getting Good at Sewing


I don't give many homemade presents beyond my strict, and very well defined, list of people who understand the meaning of - and appreciate - a handmade gift. I know you understand what I'm saying. I'm particularly critical of my skills and have been known to knit and finish an entire baby cardigan only to put it away in a box because it's not perfect enough.


The majority of people I know are on the exclusion list. It's not that they're not nice people and don't deserve receiving handmade (actually some of them are on the list because through past behaviour I know they don't deserve handmade), it's mostly that I'm embarrassed of my level of skill and not sure how it will go down.


I'm less concerned about gifting handmade to kids, especially if they're related to me in some way. I've made a few things for the nephews, but mostly kept them small.

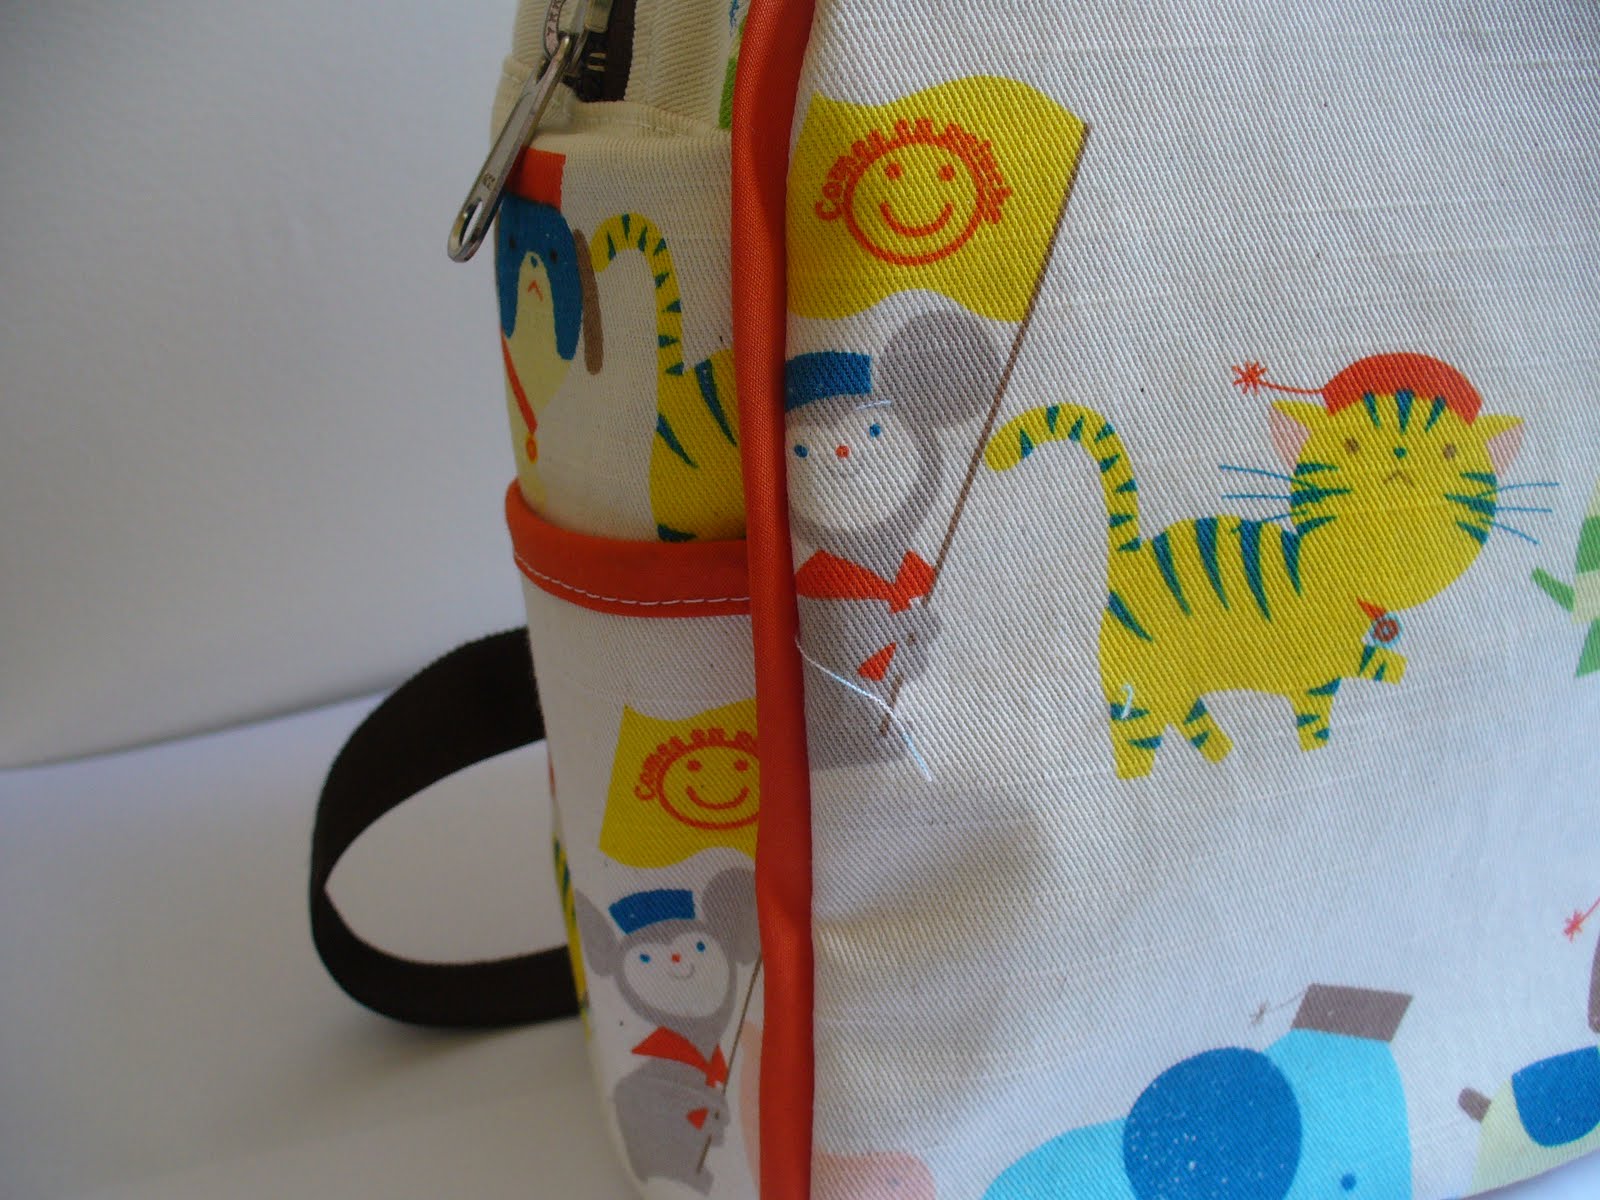
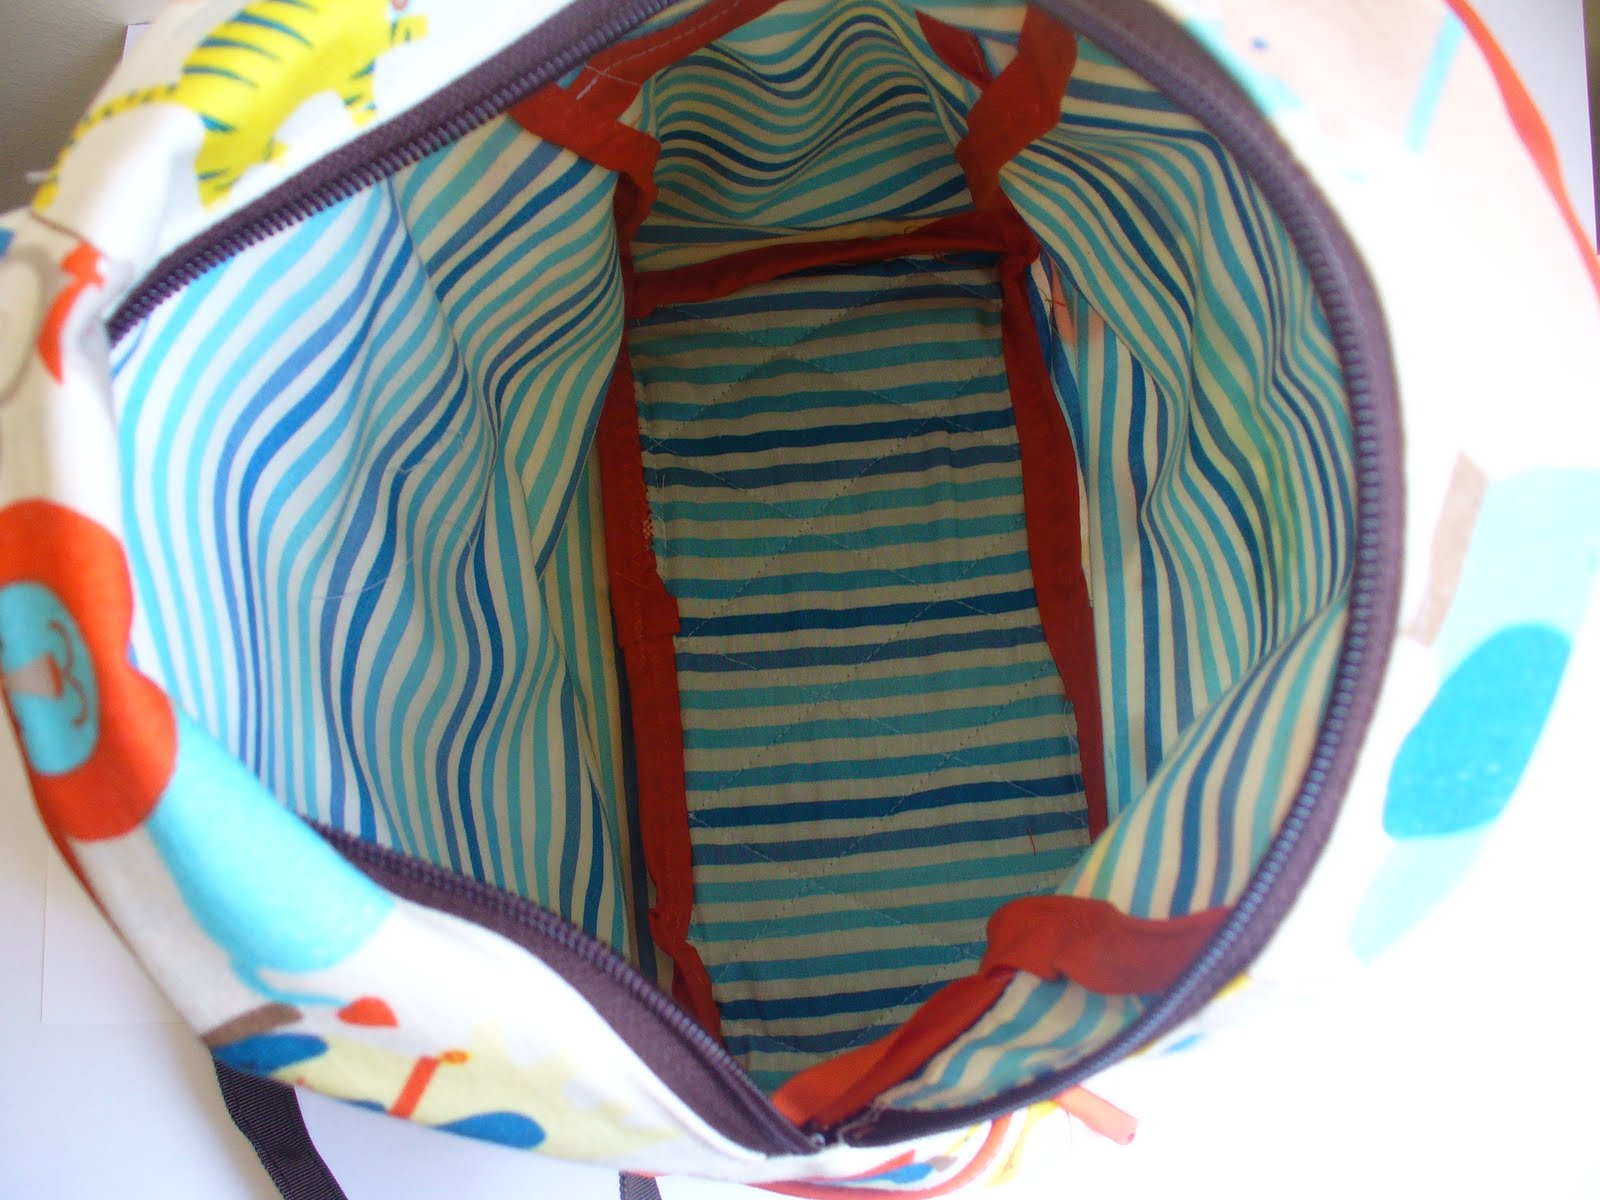
So for one of the newphew's 3rd birthdays last week I thought I'd do a backpack. I'd fudged my way through making one recently without a pattern, but this time I used the Made by Rae one, and it's pretty much exactly what I'd already figured out - but with nice instructions and good measurements.


I was pretty excited by it. I think a backpack is not a bad present for a three year old. The Smurf is not far off three and he loves carting his wordly posessions around with him. He loves his backpacks.

I decided to line the backpack and add some side pockets - which aren't included in the MBR pattern. But they're very simple to do.


I was pretty chuffed with the outcome (although I'll remember to snip stray threads before taking photos next time).

The three year old loved it and the Smurf has demanded an exact copy of his own.

But what do I make of the comment "you're getting really good at this"?

I know it was meant nicely, but I'm a bit confused.

Was I right to be embarrassed of earlier presents? Am I shit and maybe getting better? Is it a "keep up the good work, you'll get there one day" kinda thing?

Or, is it a wow you're not that bad at this, in future I needn't be so concerned about whether you'll make some kind of twee looking piece of crap and wish that you'd just do the normal thing and buy something like everyone else."

What do you think? Am I paranoid? Do you have an exclusion list? Or do you merrily make and give and to hell with what they think - at least it's not another piece of plastic fantastic!

Sunday, April 04, 2010

Bunny Hunting


Armed with the scrap box and a super easy pattern (found here), these bunnies bred like rabbits just in time for the Easter weekend.

They were so simple it was hard to restrain myself. I made a batch for all the nephews (only nephews here so far) and then I kept going to supply a bunch of toys drops.


After just one evening of sewing, I ended up with 16 bunnies in total, so I handed out a few to family to do their own drops.

The newphews' bunnies were buddied up with a couple of homemade chocolate lollipops and a sensational little ceramic egg decorating kit packaged in egg cartons. The bunnies were a huge hit with the nephews, which was a relief. One was even named lollipop and everyone took them to bed.

The Toy Society bunnies will appear over there during the week.

Sunday, February 14, 2010

For me


It's been stinking hot with humidity here lately. It's just the usual February stuff, but I'm not a fan of feeling wet all day, so I complain. And today I made a dress. It's been on my to sew list for months. Two rectangles of fine cotton gingham; lined with a handy combo of white cotton and medium red gingham; lines of shirring at the top; re-enforced; then side seams overlocked together and then re-enforced again.

A couple of those pesky lines of shirring popped out of their re-re-enforced seams, so a bit of make-it-up-as-you-go sewing complete with profanities and feet stomping ensued.

The end product is a dress I can wear on hot days, especially when I get home from work and want to step into as little as possible, but still appear decent just in case the neighbours cop an eyeful while I'm hanging the washing on the line. Works well sans bra too, but that's just for me and the neighbours to see, sorry.

The Smurf took it upon himself to sneak into the photos and copy my pose. He appeared just after this one with his bike too. Little tiger.

Sunday, February 07, 2010

A Long Time Ago


I made a little plan. Look at the date on that link, seriously that was a long time ago for fabric - cut and interfaced - to sit waiting for attention. Finally, I found the love and overcame my self-imposed concern about how to actually put the thing together.

I know, I know I could have just bought a pattern, or checked the information super highway for free tutorials, but I like the thrill of trying to figure stuff out, okay.

So, I finally figured it out and I've got to say I'm in love with this little backpack, and The Smurf is too. He wants to cram all his worldly possessions in there (other than his harmonica and lollipop, of course), note to self use heavier interfacing next time to accommodate the resident book worm and his many books.

The Three Bears fabric was from RetroMummy (bought in early 2008) and the lining a simple cotton. You can see the pattern pieces here - just a drawing. It was all very straight forward.

Next time, of yes there will be a next time, I'll add some elastic to the edges of the side pockets, an internal zip pocket and will line it a little differently. Just saying that here so I remember when I try another one.

Tuesday, February 02, 2010

Playing with Vinyl a tutorial.


New school adventures - for the nephew, not the Smurf and excitement levels are, apparently, at absolute fever pitch. It was certainly time for him to venture a little further from the nest and embark on the school adventure. I thought I'd aid him in his adventure with a pencil case with his name on it.

It went down a treat. I felt like a bit of a fraud; the whole thing was deceptively easy. That fear I'd been holding on to of sewing with vinyl - needles snapping, machine munching vinyl, stitches slipping - was completely unfounded. The project took 30 minutes from go to woe.

So, go try it yourself:

You need vinyl, a zip, scissors, sewing machine

1. Cut out 2 matching rectangles of vinyl for the outside of your pencil case. Make the longest edge slightly longer than your zip. These will be the sides of the pencil case.

2. Trace your letters onto the back of vinyl scraps or small pieces, I just used a felt tip pen. Remember to reverse the letters. I used the letter templates in this Beeper Bebe project by the very talented Holly.

3. Cut the letters out and arrange them on one of the large rectangles. Play around with the placement until you are happy. Starting with the first letter, carefully hold it in place (don't pin) and using a zigzag stitch sew to the rectangle. Repeat with each letter.


4. Using a zipper foot and with right sides facing sew one side of your zip to the top edge of your rectangle. Repeat with the other side of your zip and other rectangle. Here's a good zipper tutorial if you're scared of zippers, it's OK I once was too!

5. On the right side, of each rectangle top stitch your zipper seam.

5. With rights sides of your rectangles facing, sew the remaining three sides together (see that tutorial up there in point 4 if your not sure how to do this).

6. Using pinking shears, trim the excess. Trim diagonally across each corner, being careful not to snip the seams. If you don't have pinking shears, use an edging stitch to sew around the edge of the three sides you just sewed.

7. Turn your pencil case right side out, poke the corners out well. And you're ready for some fancy pants new pencils to put in that case.

Sunday, January 31, 2010

Pockets


Turns out pockets aren't just necessary for keeping your money safe, they're also convenient for holding your lollipop and stashing your harmonica. Yes, I will trim those two rogue threads.

Saturday, January 23, 2010

Who Wears Short Shorts?


It's hard enough to get a decent clear shot of a toddler.
It's even harder when the toddler has been busy touching up the camera lense.


They say the quickest way to a mans' heart is through his stomach. I say the quickest way to a crafty Mums' heart is to insist that the new shorts made by Mum must be worn right away. And then, later after your bath and while wearing pyjamas, you should endlessly flash your new shorts in front of the web cam so your friends on Skype can see them before insisting you change out of your PJs and into the shorts and model them for all to see.

Shorts adapted from an Ottobre pattern; "frog pants" I believe they were called. But really other than using the size as a guide for cutting, very little else was followed as I chickened out on the fly flap, did my own waistband and pockets (the Smurf's love for money means shorts without pockets are not acceptable attire) and left out the weird longer pants part. They have been sitting without the waistband for months so it was nice to get them finished ready for the impromptu Skype fashion parade tonight.

Saturday, January 16, 2010

Happy New Year


I've enjoyed my blogging break. Have been keen to come back here but there was so much fun, food and festiveness over the break that I wasn't sure where to start. Instead, I'm sharing some highlights in mosaic form.

1. Chow Down, One piece of meat at a time.
2. Hey You, The New Police
3. Pudding Time, Sadie's recipe this year, Yummo. Success and made with Grandma's pudding cloth this year.
4. Smurfs!, for the Smurf
5. Beach, it's where the sun, surf and sand are
6. A pub with a view, Best view from a pub on the East Coast. Apart from that bin. And it's like stepping back in time. Shame it's falling apart and destined for "development".
7. Sydney Sky January 8 2010, Hello sky from our backyard.
8. Keyboard Playing Cowboy, The title speaks for itself. The Smurf requested a Cowboy Hat, a Cowboy Shirt and a pink car from Santa. Santa's workshop struggled with the pink car, but eventually managed to make all toys according to order.
9. New Bikes,
10. New Bike,
11. For Santa, Salt and Vinegar Chips, Beer and a carrot (teeny homegrown) and water for Rudolph. Just like it was when I was a girl.
12. Gingerbread House - First ever, So happy with this, despite the wonk. I've been wanting to make one of these for years but always worried about the humid weather. Don't know why I waited so long!
13. Gingerbread House - First ever,
14. Gingerbread House - it's where the biccie boys live,
15. Wrapped, We downloaded wraps and gift tags this year. It was the best. Thank you Auntie Cookie and freebie gift tags (can't remember your link).
16. Summer Salad 3 ways Before, After being vego for almost a decade there are always multiple salads on our table at a BBQ.
17. Summer Salad 3 ways After,
18. Time to Celebrate, A special celebration for a special friend with a craft day spent under the frangipani tree sipping champagne.
19. So funny Time to down needles and cut the cake birthday girl.
20. The Toy Society my Toy Society Christmas Drop; 10 toys on a tree!
21. The Toy Society
22. The Toy Society - someone finding!
23. The Toy Society - Back 2 hours later and they were all gone.
24. The Toy Society - a finder with her new toy on a trip to the zoo.
25. A Picnic Quilt Built for Two.

And on resolutions, like most I don't do them - as such - but you know, be more .... fill in your blank here.

Tuesday, December 15, 2009

Hots and Not


I'm playing Loobylu's game again.

What's Hot?

Christmas is hot! This year is the first year The Smurf really gets Christmas and we've been having great fun around here teaching him all about Christmas.


Christmas Tree Ice cream Sandwiches for dessert and my first go at royal icing! Success.


Wonky homemade Christmas Advent


The Smurf getting up every morning to check the advent calendar. Every morning he squeals with delight "Christmas time Christmas time!" "I have a lolly?". Then he gets his advent card out for the day and when asked what it says, he tells us "Christmas Card".


First ever homemade mince tarts. First time ever baking, first time ever eating. I leaned on some locals for their input. Approved, apparently!


Christmas Parties in the backyard (and see first photo, which was some time after the photo above!). Good friends, good food, fun times. The most amazing Christmas Ham, 3 kinds of salad, mango salsa (which I forgot to put on the table!), prawns wrapped with pesto and proscuitto. Double chocolate tart and icecream for dessert with fruit mince tart chasers! And a jar of homemade chilli tomato jam for everyone to take home.


Decorating the Christmas Tree.


Enjoying the aroma of the fresh Christmas Tree and lights and decorations.

Backyard cricket in your undies (The Smurf) with the main blokes in your life.


That's all, no nots this week.